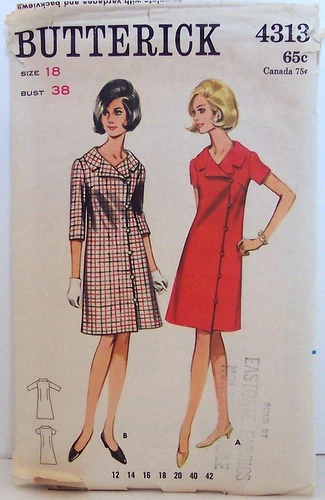
Pattern Description:
Pucci - Misses' One-Piece Dress or Tunic and Pants. Semi-fitted, A-line coatdress in mid-knee length or tunic has bias collar, seven-eighths sleeves, front snap closing with button trim and center back inverted pleat. Inset band is high at front dipping to waistline area at back. Low-waisted pants (flared at back below knee) with side back seams and side zipper closing.
(I made the tunic-length dress only.)
Pattern Sizing:
34 Bust
Did it look like the photo/drawing on the pattern envelope once you were done sewing with it?
yes!
What did you particularly like or dislike about the pattern?
The pattern is beautiful: simple and elegant and, in general, well-designed if not well-drafted.
The instructions were awful. They are overcomplicated and do not offer anything in the way of advice or tips; however, the drawings for the steps are occasionally very useful. The lining pattern and instructions are particularly un-helpful--the lining insertion is awkward and unattractive and the facing does not go all the way down to the hem. Also, the back pleat and underlay combo was confusing as anything. Thank goodness I didn't use any of the instructions!
Fabric Used:

"Muslin": Ponte doubleknit from Mood
Dress: Black cotton/poly/Lycra doubleknit from Rosen & Chaddick
Inset Band/Under Collar: Pucci-printed stretch Lycra from Mood
Lining: Silk charmeuse from Mood
Hair canvas from NY Elegant Fabrics
Fabric-covered buttons (made from Pucci scraps): Botani Buttons
I went with the more expensive R&C for my fashion fabric because you get what you pay for--it is richer, thicker, smoother and nicer to work with than the Ponte. (and twice as expensive!!) Also, R&C has fantastic service. Every time I went there I was served by one of the owners, who had a lot of helpful advice about fabric choices.
Pattern alterations or any design changes you made:
I worked on this pattern with Kenneth King and Susan Khalje at the August Sit n' Sew workshop in NYC. With Kenneth's guidance, I drafted a new lining pattern and facing piece as well as a more tailoring-friendly upper collar and lower collar combination with favoring built in to accommodate turn-of-the-cloth and encourage the lapel pieces to fall the way they are supposed to. We eliminated the back facing and reduced the sleeve cap ease. We also raised the armscye to facilitate arm movement.
Would you sew it again? Would you recommend it to others?
I would not sew it again because it is a distinctive look and I think I am overcoming my love of coat dresses (this is my third one)--but it is certainly unique and distinctive and has a design that separates it from other, simpler coat dress patterns that I have seen from this era. I might try the trousers in the future.
Construction:
Following my experiments in tailoring with Simplicity 2723 I continued using the methods described in Kenneth King's "Tailored Jacket" e-book. I also shelled out for 1 yard of actual Pucci stretch knit from Mood and tried to think strategically: I ended up using it for the inset band, the under collar, and the buttons (and had enough left over to cut out a knit top and possibly a swimsuit). Obviously, slinky Lycra knit is not entirely compatible with beautiful and luxurious doubleknit, so I made a sort of sandwich using scrap doubleknit from my muslin, bias-cut interfacing and very careful thread basting to back the Pucci:
 Fabric sandwich: Pucci Lycra over Ponte Doubleknit over woven bias-cut interfacing, basted together, stitched into the dress, with seam allowances clipped and catch-stitched in place
And then repeated the process with the under collar, except with padstiched hair canvas instead of woven interfacing:

Under collar smoothed and pinned in place--you can see the Moire pattern from the canvas through the Lycra! Fortunately this only shows up in the photo--it is a trick of the light.
To hold the collar in place, I catch-stiched both fabrics together at the collar roll line and then folded it over a tailor's ham to determine turn-of-the-cloth, which I then tailor-basted in place to make later sewing easier.
I went all-out on the padstitching and then steamed the lapels in place to mark turn-of-the-cloth.


I interfaced the lapel facings with hair canvas, which I think was a mistake and would not do again. Yes, it made for super-stable lapels, but overall I think it gives too much structure and stiffness to the garment. I think padstitched body interfacing alone would have been sufficient.
 Lapel facings in place, thanks to my faithful assistant...
Who soon pooped out on me! :-)

I went all-out on the padstitching and then steamed the lapels in place to mark turn-of-the-cloth.
I interfaced the lapel facings with hair canvas, which I think was a mistake and would not do again. Yes, it made for super-stable lapels, but overall I think it gives too much structure and stiffness to the garment. I think padstitched body interfacing alone would have been sufficient.
Lapel facings in place, thanks to my faithful assistant...Who soon pooped out on me! :-)