Showing posts with label Simplicity. Show all posts

Simplicity 7885 (1977): Batik dress and zipper fail

This latest sewing adventure actually started years ago with a piece of fabric that my father brought home to me from Indonesia:


Four yards of authentic, hand-painted, batik, in black, white, and burgundy, decorated with exotic flowers and large birds (Garuda, maybe?).

Obviously, this is the kind of thing that you don't want to mess up because it's not like you can run down to Hobby Lobby and get a couple more yards, right? I had to save it for the right pattern.

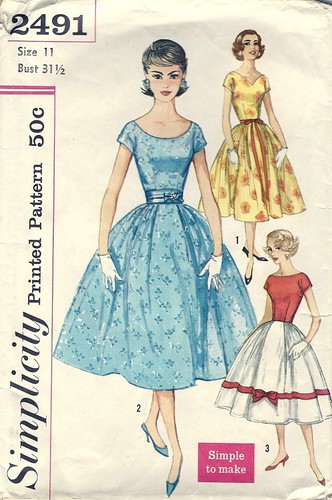
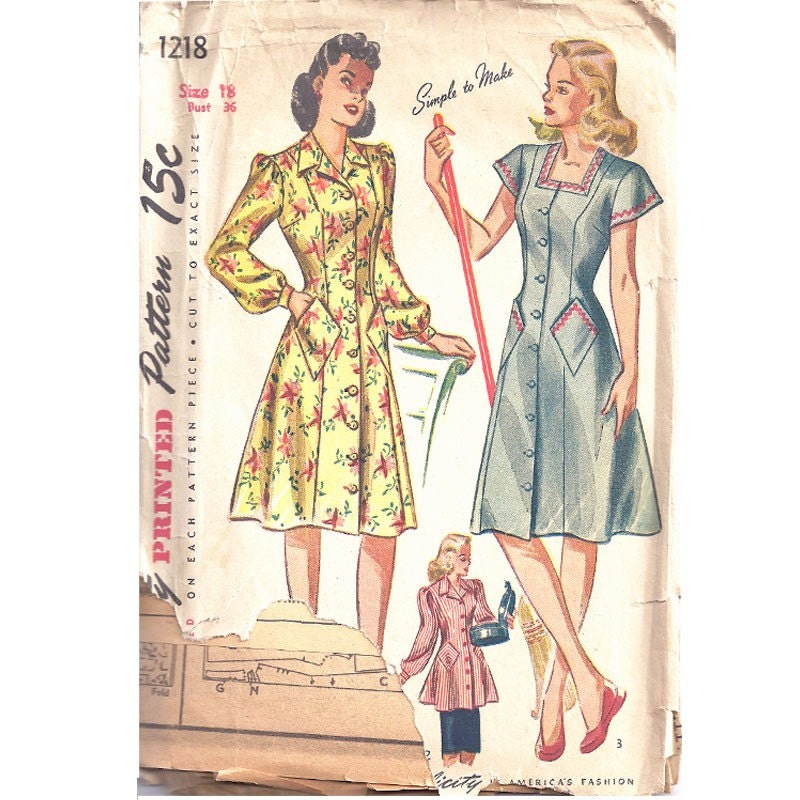
I finally settled on Simplicity 7885 (1977), which had a vaguely Asian-inspired wrap top and a plain A-line skirt that wouldn't force me to cut the fabric up too much, obliterating the large-scale pattern.


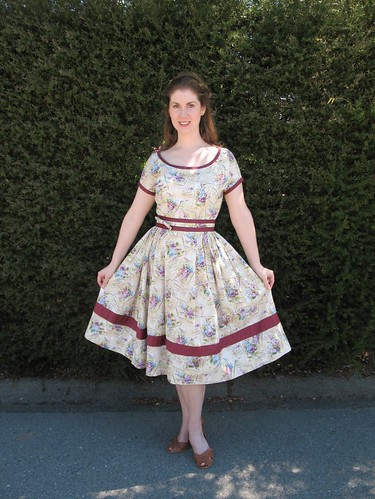
The results, I swear, are better than this squinting-into-the-sun picture suggest. I don't know why my legs are foreshortened so much, either.

In the backyard of Houston's Beer Can House, which seems to make an excellent alt-fashion photo-shoot location.

That top absolutely needs a camisole. I placed the buttons as prescribed and it's still below the bra line. Granted, my taste in lingerie is very far from racy, but come on, people--this is day wear.

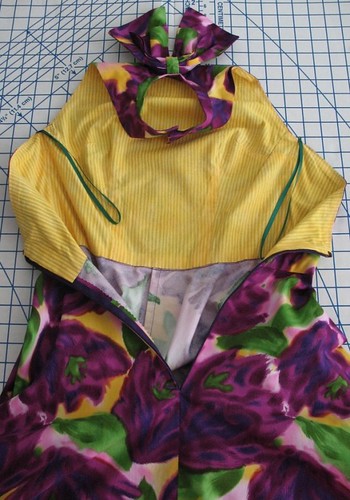
I almost destroyed the whole project in my efforts to improve on the skirt. I had to add side-seam pockets, of course, and I also decided to cut the front and back halves on the fold instead of piecing them in halves as the pattern required. If you do the math, you'll realize that that means I eliminated all four skirt seams. Doh!

I won't waste your time with it here, but I ended up fudging by topstitching the zipper in. You can see this bit of sewing abomination in the Flickr set. If my dad had come home a week later, I could have used Casey's zipper tutorial and not made such a has job of it.

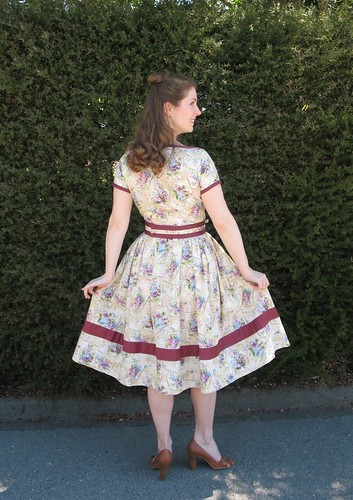
(Luckily, the peplum covers the exposed zipper. I'm also ashamed to admit that my incorrectly-installed zipper went in faster, more easily, and with generally better results than any of my correctly-installed zippers ever has. I am zipper-challenged.)

Cummerbunds and Bows


I absolutely adore reproduction vintage patterns.  I also love vintage patterns – they both have their pros and cons.

I purchased Simplicity 2491 from an ebay seller.  


The envelope on my copy is horribly torn, but there are yardage notes written by a previous owner.  


The pattern tissue for the scoop-neck version (the one that I chose) was obviously made up by someone as the edges of the tissue have been cut in places with pinking sheers.  I absolutely love the idea that someone used this very pattern tissue to make up their own version of the pattern – I only wish that I could see how it turned out!


So I will be the first to admit that working with vintage patterns is wonderful and always an adventure.  However, I do have a few issues with them.  For one, you can never be sure that the pattern will be complete until you open it up and examine everything.  Also, the tissue may be ripped or smell funky, which is never fun.  I have had a couple of unfortunate ebay experiences (thankfully, not with Simplicity 2491) in which the pattern tissue inside the envelope had nothing whatsoever to do with the advertised pattern.  When you do find the pattern of your dreams, it is often in a size that will not work without major adjustments.  And, of course, when I want a bit of instant sewing gratification I can just cut into, a vintage pattern is not the way to go.

Enter the reproduction pattern.  


I am so thankful that there is enough interest in vintage looks that companies big and small are reproducing and saving these wonderful patterns, although they sometimes making fitting alterations that I do not always appreciate. 


 This is not the first vintage reproduction from the McCall pattern company that I have made, and it will surely not be the last.  Try as I might, I cannot resist the adorable vintage pattern sketches on each envelope, no matter how simple the silhouette. 


It is actually a brilliant marketing ploy – everything looks better on an elongated fashion sketch with an impossibly small waistline! 

For this particular pattern, I had some serious gaping from the upper bust area to the neck.  I thought I had fixed the problem using the muslin (what a good girl I am!), but after putting my dress together, the neckline was still not laying flat.  To fix the problem, I added another dart.  Unfortunately, the dress was already lined, so it is not the prettiest fix in the world, but it makes the dress wearable.  And I should have added a bit of boning at the center back bodice as it has a tendency to pull downward over a day of wear.


Overall, I am very pleased with the end result, and plan on using many more of the reproductions in my stash, and I am sure that I will be seduced by another adorable envelope illustration in the future and add to my extensive collection! 

More of my vintage adventures may be found over at my blog, Lilacs & Lace.  Feel free to stop by and say hello! 

Simplicity 7353 1976

I have wanted to make this shirt for a while now but couldn't find the right fabric for it in my stash until now.  When I did finally pull it out I found that the previous owner had made her adjustments to the pattern itself so I had to do a bit of adding seam allowances etc to get it back to the original size.  I don't mind it when things like this have happened with old patterns, it gives them more character and at least it had been used!

The collar had been majorly cut back, I assume because the style changed so dramatically from the late 70's to the 80's.  Besides the collar the shirt is pretty much timeless I think, but as I love a good 70's collar I altered the piece back to it's giant pointy proportions!


 The pattern has facings for the armholes which are a nice touch and were drafted perfectly, no easing required, why aren't modern patterns drafted this well? There are 2 small darts at the top back as well to shape it which are a lovely touch.

 The buttons on the shirt are from my Grandmother's button box.  They're not old old but definitely from the 80's if not a little earlier judging by the price that was on the card they were attached to.


I'm really happy with the way this came out and I'm sure I'll be using the pattern again in the future.

Anna
finally waking up

The Plain Pattern Project Dress #1

Dress #1 The one that is closest to the original pattern.


*whew* I worked on fit a lot with this dress. You can see more finished images on my site. And of course, all the construction stuff is on the blog

Yay sewing!

Anniversary Dress


Hi Fellow Seamsters and Seamstresses!

I recently finished a dress from Simplicity 3463 in a thrifted fabric (maybe challis? I am still not a good fabric detective). The pattern is "Simple to Make" circa early 1960s.
Image courtesy of the Vintage Pattern Wiki


Adjustments: I made a size 16. I shortened the bodice by one inch and removed an inch at center front and center back at the neckline only, tapering to nothing at the waist.

Pattern Instructions: I did not follow them. I knew I would want to wear this dress with a pretty vintage slip, so instead of the facings, I used turned bias facings at the arms and neckline, as my fabric was a little sheer. I also did not use the pattern for the skirt pieces, which were just a few gathered rectangles. Instead I cut as large a rectangle as I could from my remaining fabric for the front and back of the skirt, and then divided the back into two rectangles. I did not have quite the amount of fabric called for, and I prefer a less full skirt, so I improvised. I gathered each of the rectangles and pinned them to the completed bodice to see how it looked. I ended up removing some fabric from the front skirt panel, as it seemed to full at first. Instead of finishing the overlapped edges at the back of the skirt, I simply cut them on the selvedge and pressed it under about an inch and a half.

Problems: The bias facing is a little stiff, and my fashion fabric puckers in a few spots where I slip stitched it, but it is generally nice in front. Also, I didn't realize when I bought this pattern that the dress closed with hook and eye closures, I assumed it tied. Sewing the hooks and eyes in the proper places was a bit of a pain, and I ended up doing each at least twice. I also added a snap at the center back about half way up to eliminate gaping. Because of these issues, the back doesn't lay perfectly, but it's probably something you fellow seamstresses and seamsters [: )] will notice and most people I encounter while wearing it will not.

What I love about it: The fabric is nice for this dress ($1.50 thrift store find!) I like the depth of the hem on the skirt. I also like the fit. I read a post by Debi of Fashions from the Past where she said she often used patterns of one brand and from one era, so she knew what adjustments she would need to make without a muslin. Brilliant! I realized I sew mostly from early 60s Simplicity patterns, and can probably make similar adjustments when I do. So, I made no muslin, instead tissue fitting based on adjustments to a previously made dress. This is probably the best finish I have acheived on a dress as of yet, and I wouldn't be embarassed at all to show someone the inside. I serged at the side seams and shoulders (where I didn't use bias) and used a nice, soft hem lace. I tried to make by hemming stitches even, and I tried to sew the closures on neatly according to the Threads instructions (at least the first time anyway!)
Inside out view....AAAAHHH! Baby hands! 
What I would do differently next time: I'd like to make some similar dresses that are a little more casual- maybe in a knit fabric. I am really a casual sort of broad, so it would make sense for me to sew everyday garments, but I end up sewing pretty stuff that I don't want to collect chicken eggs in, and I end up wearing jeans. I'd like to adjust the pattern to use the tie as a closure in place of the blasted hooks and eyes.

Well, as the title of this post would insinuate, I sewed this dress to wear out for my anniversary. I have posted more on that and the funny looks we got for being "all dressed up" over at my blog Farmhouse Garden. There are also a few more pics of my finished dress.

Thanks for all of the sewing inspiration! I love being a part of the Sew Retro community!

Stitchery: Simplicity 8767 - Circa 1978

This was a nice simple pattern, zip front hooded jacket from 1978.

Simplicity 8767 Hooded Zip Front Jacket
I made it from an old army issue blanket for my brothers birthday

Simplicity 8767 Hooded Zip Front Jacket

And lined it in a retro pin up Alexander Henry print.

Simplicity 8767 Hooded Zip Front Jacket

 Please visit my site for more pictures and full details.

Simplicity 1201

Hi everybody!

I just blogged about my version of view 4 of this pattern:


And here's how my interpretation looks:


Feel free to visit my blog for more! :)

Vtg Simplicity 2757 ~ the Bicycle Dress

I just finished this sweet little bicycle print cotton sundress.


I used this amazing vintage Simplicity:


More details over at my blog!

Finally Wearable Dressing Gown / Bath Robe

In October last year I decided I wanted a nice warm dressing gown to wear all winter so I pulled out this pattern and dyed some killington flannel.  I must have been influenced by the pattern photo as I ended up dying my fabric almost the same shade as the cover picture!

 It went together really easily and I was happy with the length and the fit, plus killington flannel is really warm so it all seemed to have worked out fine.
 You can see the darts on the front and the top of the sleeves, you just don't get that from modern patterns.

Although it all looked good when I actually wore the dressing gown it drove me insane.  The button loops just did not stay shut which meant that it let in the cold air and didn't fulfil its duty to keep me nice and warm.  I think had they been sewn with the ends closer together it might have worked better or perhaps if I'd used elastic.  I had done what the pattern instructions called for.

Sadly, it hang on the back of my sewing room door until today when I finally did some buttonholes.

I think it looks ok even though the design wasn't meant to have buttonholes.  It will hang better on a real person than on my dressform.  Why it took me 8 months to do 6 buttonholes I really don't know and of course it's now too warm to wear it, but come colder weather I am now ready to go!

Anna
finally waking up

Two new dresses for me...

Now that it's turning into summer, my unfinished-basement sewing area (which is a chilly torture chamber in winter) is starting to feel gooood. So I decided to make myself a few more dresses while I've got the creative juices flowing.

First up, a 1944 housedress pattern (I've been yearning for a housedress for the longest time).
I fell in love with the diamond shaped pockets, like, instantly. I made this up in one of the prints from the new DS Quilts (DS = Denyse Shmidt, dunno why JoAnn's is being all coy about it) line from JoAnn's.

Nine buttonholes and a LOT of rick-rack later, here I am, all ready to start a scrap metal drive for Victory:

As you can see, the tops of those cunning diamond-shaped pockets flop over all the time. I knew they would. Before I wear it again, I'm going to put a vertical buttonhole near the top of each diamond and then the pockets will button closed. They sure are handy - I keep my cell phone in one pocket and my MP3 player in the other, which I am sure is what Simplicity's designers had in mind back in 1944.

My second project was a dress for my sister's upcoming wedding. My sister sews vintage dresses at a rate that puts me to shame (and I've pestered her many a time to join this site), so the least I could do was make one for her wedding. I actually started with this pattern (undated, but probably early 60s?) and then altered the heck out of it.
I used the short sleeve version (she's getting married in the desert, in the summer - thanks for nothing, sis!) and moved the zipper from center back to side so I wouldn't have to worry about matching a GIANT print. I scooped out the neckline, too, only I scooped it out too much and it showed my bra straps six ways to Sunday. So I made little inserts out of the few precious bits of fabric I had left and then sewed bows over them, because duh, bows are fun. I replaced the original skirt, which was pleated in the front and fitted in the back, with a nice full dirndl that used up most of the 4 yards I was able to scare up. Did I mention that I like to fall in love with prints long after they have gone out of production, and I had to hunt every dark corner of the internet to find enough yardage for a dress?

Here it is with the hat, the shoes, and the crinoline petticoat so you get the full effect. I think in the end it looks more Fifties than Sixties. I wish you could all know how unbelievably haughty I feel in this get-up.

Stabilo Dress

Hi everyone !

Here's my new dress :


I used the pattern Simplicity 6549, a 1974 pattern from Etsy  :


More information on my blog

Simplicity 5405 (1973) help?

Does anyone out there have Simplicity 5405 (1974), seen here at the Vintage Pattern Wiki, and can tell me if it has bust darts or not? Or bust shaping of any sort?

Also: Thursday at noon is the closing for entries for the Marian Martin dress giveaway!

1950s Easter dresses for two very darling girls!

In spite of not starting these until the Tuesday before Easter, I finished these frocks with enough time to do a photoshoot and Easter isn't until tomorrow! Of course getting a decent picture of two very active girls is a bit of a trick...
With Amy (little one's) dress, I decided to leave the scalloped apron unadorned. What with the waist tie (I cheated and used a ribbon) and the little bow at the collar and the contrast and the topstitching on the pintucked yoke, I felt like there was enough happening on the front of her dress!
Oh, and a word to the wise - if you decide to make a dress like this, don't use Kona cotton for the apron. Two layers of Kona, gathered, at the waist was right bulky! I was so afraid I was going to break a serger needle on it!

Betsy's dress is a dropped waist style which works well if you have a girl like mine with a looong torso. She still fits into her thrift shop crinoline slip from last year - that was one less thing I had to do!
The ribbon trim was my favorite part. I sew ribbons on everything.

I am so pleased with how these turned out; I hope the girls don't outgrow them anytime soon! Then again, the sky blue material was re-purposed from a bed sheet so they didn't really cost us anything.

Simplicity 4714 (1943)

Here's the pattern packet (from the Vintage Sewing Pattern wiki, listed there as Simplicity 4714 B):


And here it is in real life:

Yeah, I need a hair tutorial. Badly.

You can follow all the drama on my blog. It's actually a size too big; it looks better here than it does in real life, but it's still very wearable. I just look like I'm trying on my big sister's clothes. I will definitely be resizing this to a 16, though, because it's far too awesome a dress not to make again. I love the box pleats in the bodice, which give it some shape but don't make it restrictive.

The really fun part was that, after I posted a picture to Facebook, a friend of mine who is a lady "of a certain age" commented that she made the same pattern for Home Economics class in eighth grade, in 1943!

Dodgy Beige into something simple!

Hey guys!

For the Sew Weekly challenge this week, we made our garments from a pattern than had a 'questionable' cover! My Husbie named this one 'Dodgy':


And it didn't turn out too badly!


It's a cotton drill fabric, from my stash, and being shorter and not a beige colour makes all the difference I think!

See more at the Sew Weekly and on my blog!

xoxo